Introduction
A heart-shaped cake is the perfect way to express love and celebrate special moments. Whether you’re making it for Valentine’s Day, an anniversary, a birthday, or just because, this delightful treat adds a personal touch to any occasion.
This beginner-friendly guide will walk you through the steps of creating a heart cake from scratch, including easy-to-follow decorating tips that will make your cake look as beautiful as it tastes. No advanced baking skills required—just a little creativity and love!
Ingredients and Tools You’ll Need
Essential Ingredients for the Cake Batter
Before you start baking, gathering the right ingredients is crucial for a soft, moist, and flavorful heart cake. Here’s what you’ll need:
Basic Ingredients:
These are the key ingredients that form the base of your cake:
- Flour – Provides structure and stability to the cake. Use all-purpose or cake flour for a lighter texture.
- Sugar – Adds sweetness and helps retain moisture. Granulated sugar is commonly used, but brown sugar can add a richer taste.
- Eggs – Act as a binding agent and contribute to the cake’s fluffiness. Room-temperature eggs work best for even mixing.
- Butter or Oil – Butter adds a rich, creamy taste, while oil can make the cake extra moist. Choose based on your preference.
- Vanilla Extract – Enhances the flavor and gives the cake a warm aroma.
- Baking Powder (or Baking Soda) – Helps the cake rise and become airy. Make sure it’s fresh for the best results.
- Milk or Buttermilk – Adds moisture and improves the cake’s texture. Buttermilk also enhances the softness.
Optional Flavors and Variations:
To customize your heart cake, you can add unique flavors:
- Chocolate – Use cocoa powder or melted chocolate for a rich, indulgent taste.
- Red Velvet – A combination of cocoa powder, vinegar, and red food coloring creates this classic, slightly tangy flavor.
- Strawberry – Blend fresh or freeze-dried strawberries into the batter for a natural fruity taste. A few drops of strawberry extract can also enhance the flavor.
Alternative Ingredients for Dietary Preferences:
If you or your guests have dietary restrictions, consider these alternatives:
- Gluten-Free Option – Use almond flour, coconut flour, or a gluten-free baking mix.
- Dairy-Free Alternative – Replace butter with coconut oil or dairy-free margarine, and use almond or oat milk instead of regular milk.
- Egg-Free Substitute – Use unsweetened applesauce, mashed banana, or flaxseed mixed with water (flax egg) as a replacement.
- Low-Sugar or Sugar-Free Option – Swap sugar with honey, maple syrup, or a sugar substitute like stevia.
By choosing the right ingredients, you can tailor the cake to suit different tastes and dietary needs while ensuring it remains delicious and moist!
Tools Required for Baking and Decorating
Having the right tools makes baking and decorating a heart-shaped cake much easier. Whether you’re using a traditional heart-shaped pan or creating the shape yourself, here are the essential tools you’ll need:
1. Cake Baking Essentials
- Heart-Shaped Cake Pan – The simplest way to get a heart-shaped cake is by using a heart-shaped baking pan. If you don’t have one, don’t worry! You can create a heart shape using a round pan and a square pan (explained in the next section).
- Mixing Bowls – A few large mixing bowls are needed to prepare the batter, whip frosting, and mix colors.
- Spatula & Whisk – A rubber spatula helps scrape down the sides of the bowl, ensuring even mixing. A whisk is useful for hand-mixing dry ingredients or small batches of batter.
- Electric Mixer – While you can mix by hand, an electric mixer (hand or stand) makes the process faster and ensures a smooth, lump-free batter.
2. Cake Decorating Tools
- Piping Bag & Tips – Essential for decorating the cake with buttercream flowers, borders, or lettering. You can choose different piping tips for different designs.
- Frosting Spatula – Also known as an offset spatula, this tool helps spread frosting smoothly over the cake.
- Food Coloring – Adds vibrant colors to your cake batter, frosting, or decorations. Gel food coloring works best as it provides intense color without affecting the texture.
- Fondant & Fondant Tools – If you prefer a sleek, smooth look, fondant can be rolled and shaped to cover your cake or create decorative elements like hearts and flowers.
With these tools, you’ll be able to bake, shape, and decorate your heart cake like a pro, whether you’re keeping it simple or going for an intricate design!
Choosing the Right Frosting and Decorations
The frosting and decorations you choose will determine the final look and taste of your heart cake. Whether you want a smooth and elegant finish or a fun and colorful design, here’s how to pick the best options:
1. Buttercream vs. Whipped Cream vs. Fondant
Each type of frosting has its own texture, flavor, and best use case:
- Buttercream – The most popular choice for frosting cakes. It’s rich, creamy, and easy to pipe into decorative designs. You can also add food coloring for a customized look. However, it can be slightly heavy and sweet.
- Whipped Cream – A lighter alternative, perfect for a soft, airy texture. It’s great for a fresh and delicate taste but doesn’t hold up as well in warm temperatures.
- Fondant – A smooth, pliable sugar paste that gives a polished and professional look. It’s ideal for creating intricate designs and decorations but can be chewy compared to other frostings.
2. Color Themes for Different Occasions
Your heart cake can be styled to match different events with color themes:
- Romantic (Valentine’s Day, Anniversaries) – Shades of red, pink, and white with elegant piping or rose designs.
- Birthday or Celebration Cake – Bright and cheerful colors like blue, yellow, or purple with fun sprinkles or metallic accents.
- Minimalist and Elegant – Soft pastels, ombre frosting, or a white fondant base with gold or silver touches.
3. Decorative Elements for a Stunning Finish
Take your cake to the next level with these decoration ideas:
- Sprinkles and Edible Pearls – Add texture and a playful touch.
- Chocolate Drizzle – A melted chocolate ganache dripping from the edges gives a luxurious finish.
- Edible Flowers and Fruits – Fresh berries, roses, or edible petals make the cake look natural and beautiful.
- Piped Designs – Use buttercream piping to create hearts, rosettes, or elegant borders.
By choosing the right frosting and decorations, you can create a heart cake that not only tastes delicious but also looks stunning for any special occasion!
Step-by-Step Guide to Baking the Heart Cake
Preparing the Cake Batter
A well-prepared cake batter is the foundation of a soft, fluffy, and delicious heart cake. Follow these steps to ensure your batter turns out perfect:
1. Mixing Ingredients Properly for a Fluffy Texture
- Start by sifting dry ingredients (flour, baking powder, cocoa powder, etc.) to remove lumps and aerate the mixture, ensuring a lighter texture.
- In a separate bowl, cream butter and sugar together until the mixture becomes light and fluffy—this helps create a soft cake. If using oil instead of butter, mix it well with sugar to retain moisture.
- Add eggs one at a time, mixing well after each addition to incorporate air into the batter.
- Alternate adding dry ingredients and liquid ingredients (milk or buttermilk) in small batches to prevent overmixing, which can make the cake dense.
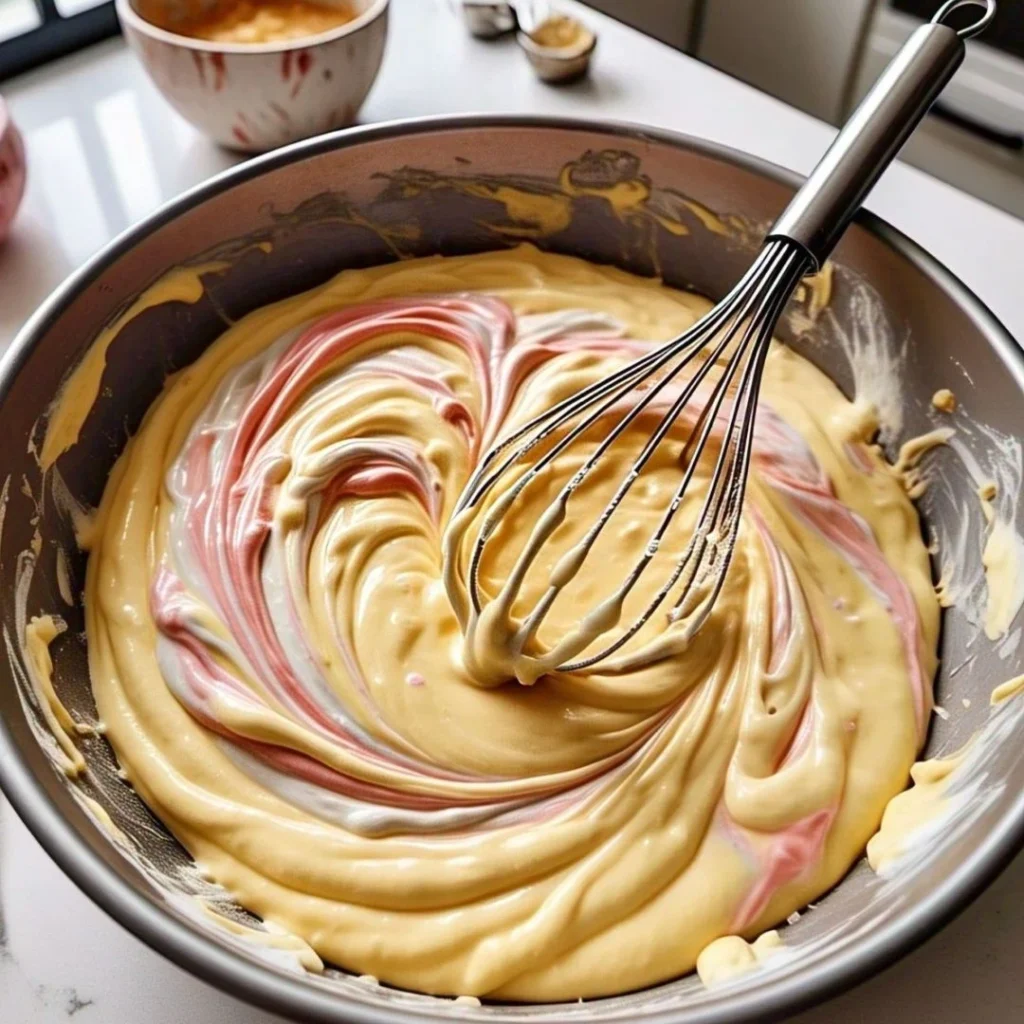
2. Adding Flavors and Coloring if Needed
- To enhance the taste, you can add vanilla extract, almond extract, or citrus zest depending on the flavor profile you want.
- For chocolate cake, mix in cocoa powder or melted chocolate.
- If making a red velvet heart cake, add red food coloring and a small amount of vinegar to balance the color and flavor.
- Always use gel-based food coloring instead of liquid, as it provides more vibrant color without altering the batter’s consistency.
3. Pouring the Batter into the Cake Pan Correctly
- Grease and flour your cake pan or line it with parchment paper to prevent sticking.
- If using a heart-shaped pan, pour the batter evenly and tap the pan gently on the counter to release air bubbles.
- If using a round and square pan method, distribute the batter evenly between both pans so they bake at the same rate.
- Fill the pans only 2/3 full to allow space for the cake to rise properly without overflowing.
By following these steps, your heart cake batter will be smooth, well-mixed, and ready to bake into a light and fluffy masterpiece!
Baking and Checking for Doneness
Getting the perfect texture for your heart cake depends on proper baking techniques. Follow these steps to ensure your cake bakes evenly and turns out soft and delicious.
1. Oven Temperature and Baking Time
- Preheat your oven to the recommended temperature before placing the cake inside. Generally, cakes bake at 325–350°F (163–177°C), but this can vary based on the recipe.
- Place the cake pan on the middle rack of the oven to ensure even heat distribution.
- Bake times vary depending on the pan size:
- Heart-shaped or round 8-inch cake – 30 to 35 minutes.
- Larger cakes (9-inch or layered cakes) – 40 to 45 minutes.
- Cupcake-sized mini heart cakes – 18 to 22 minutes.
- Avoid frequently opening the oven door, especially in the first 20 minutes, as this can cause the cake to sink.
2. Using the Toothpick Test to Check if the Cake is Baked
- Insert a toothpick or cake tester into the center of the cake. If it comes out clean or with a few moist crumbs, the cake is done.
- If the toothpick comes out with wet batter, bake for an additional 3–5 minutes before testing again.
- Another way to check is by gently pressing the center of the cake—if it springs back, it’s fully baked.
3. Cooling the Cake Before Decorating
- Once baked, remove the cake from the oven and let it sit in the pan for about 10–15 minutes to set.
- Run a knife along the edges of the pan and carefully turn the cake onto a wire rack to cool completely (about 1–2 hours).
- Never frost a warm cake! If needed, place the cake in the refrigerator for 20–30 minutes to speed up the cooling process.
By following these steps, your heart cake will have a perfectly baked texture, ready for decorating!
How to Shape a Heart Cake Without a Heart-Shaped Pan
If you don’t have a heart-shaped cake pan, don’t worry! You can still create a beautiful heart cake using a simple trick with a round and square cake pan. Here’s how:
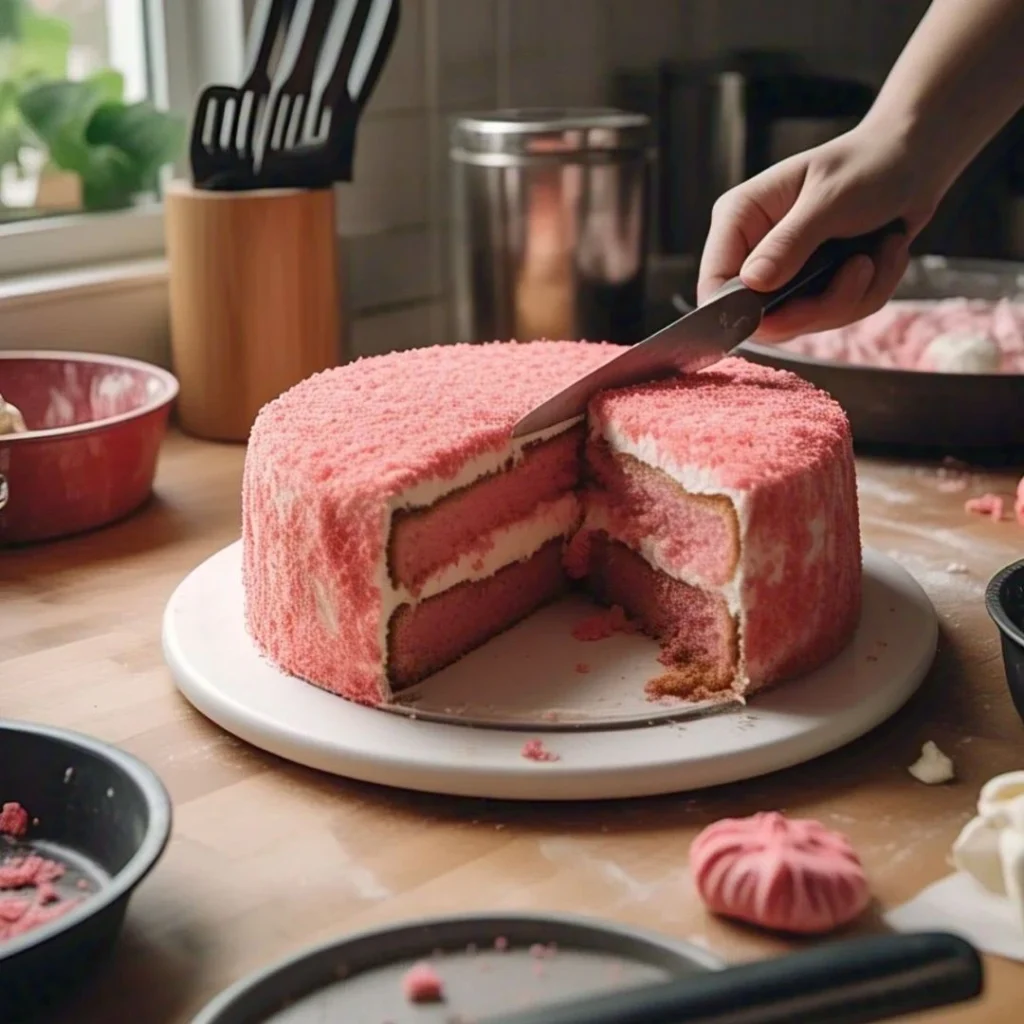
1. Using a Round and Square Cake to Create a Heart Shape
- Bake one round cake and one square cake of the same size (e.g., 8-inch or 9-inch).
- Once both cakes are fully cooled, place the square cake diagonally (like a diamond shape) on a flat surface or cake board.
- Cut the round cake in half to create two equal semicircles.
2. Cutting and Assembling the Pieces
- Position the two semicircles on the top sides of the square cake, aligning the curved edges with the top corners of the square.
- This forms a heart shape! If the pieces don’t fit perfectly, trim slightly to adjust.
- Use a little frosting as “glue” between the pieces to hold them in place.
3. Securing with Frosting for a Seamless Look
- Apply a crumb coat (a thin layer of frosting) over the entire cake to fill in any gaps and smooth out the edges.
- Let it chill for 15–20 minutes before adding the final layer of frosting.
- Use an offset spatula to spread the frosting evenly and create a polished finish.
- Decorate as desired with piping, sprinkles, or fruit for a stunning heart cake!
With this simple method, you can make a heart-shaped cake for any special occasion—no special pan needed!
Decorating Your Heart Cake Like a Pro
Applying the Base Frosting Layer
A well-applied base layer of frosting is key to a smooth and professional-looking heart cake. Follow these steps to ensure an even and polished finish before adding decorations.
1. Crumb Coating Technique for a Smooth Finish
- Before applying the final frosting, spread a thin layer of frosting over the entire cake—this is called a crumb coat.
- The crumb coat helps trap loose crumbs, preventing them from mixing into the final layer.
- Use an offset spatula or a butter knife to spread a light coat of frosting evenly over the cake.
- Let the crumb coat set in the refrigerator for 15–20 minutes until it firms up.
2. Letting the Frosting Set Before Adding Details
- Once the crumb coat is firm, apply the final layer of frosting using smooth, even strokes.
- If you want extra-smooth frosting, chill the cake again for 5–10 minutes, then go over the frosting with a warm spatula (dip it in hot water and wipe dry).
- Let the base frosting sit for a few minutes before adding piped decorations, sprinkles, or other details.
3. Best Spatula Techniques for Even Coverage
- Use a large offset spatula or bench scraper to smooth the sides and top of the cake. Hold it at a slight angle and rotate the cake for an even finish.
- For a textured look, use the back of a spoon or a spatula to create swirls or ridges.
- Work in thin layers to avoid excessive frosting buildup, making it easier to spread evenly.
Once your base frosting layer is set and smooth, your heart cake is ready for decorative touches that will make it stand out!
Creative Decorating Ideas
Once your heart cake is frosted, it’s time to make it visually stunning with creative decorations. Whether you want a romantic, elegant, or fun design, here are some ideas to elevate your cake’s appearance.
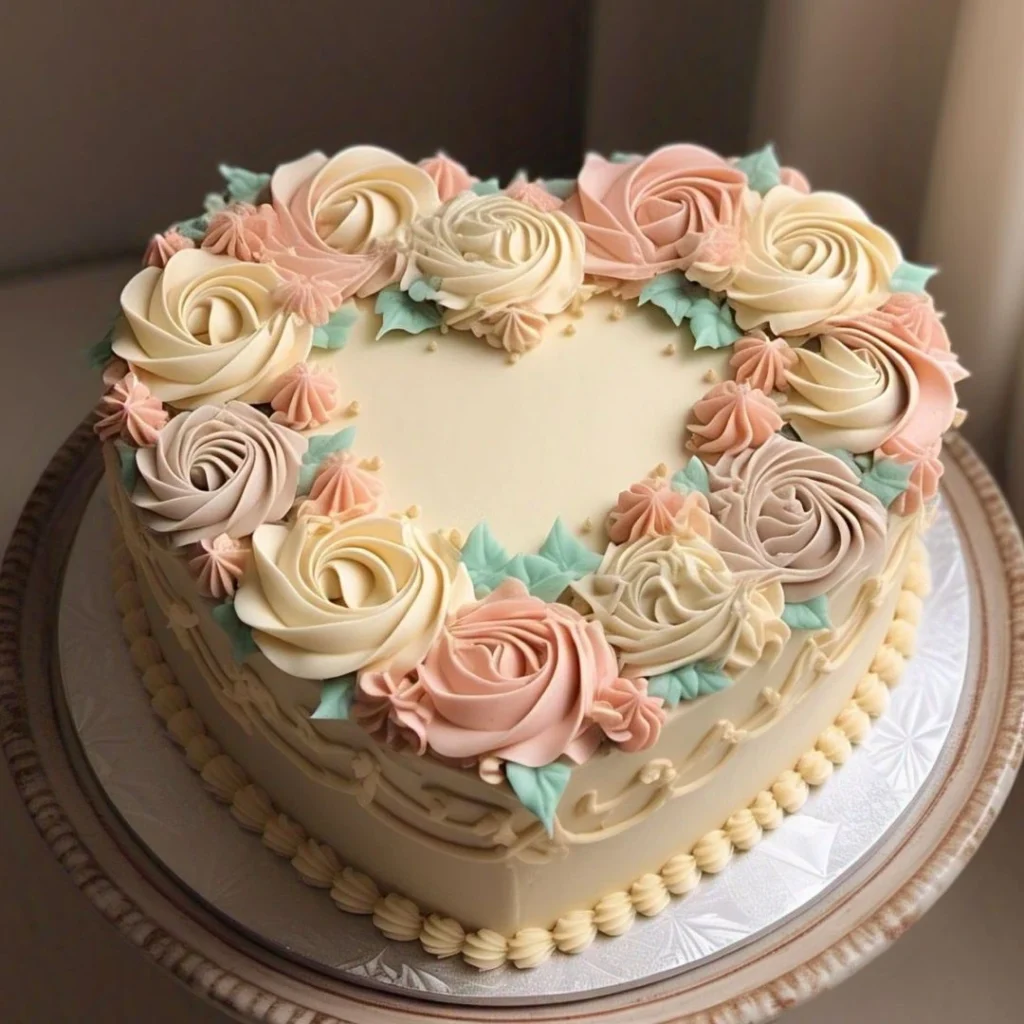
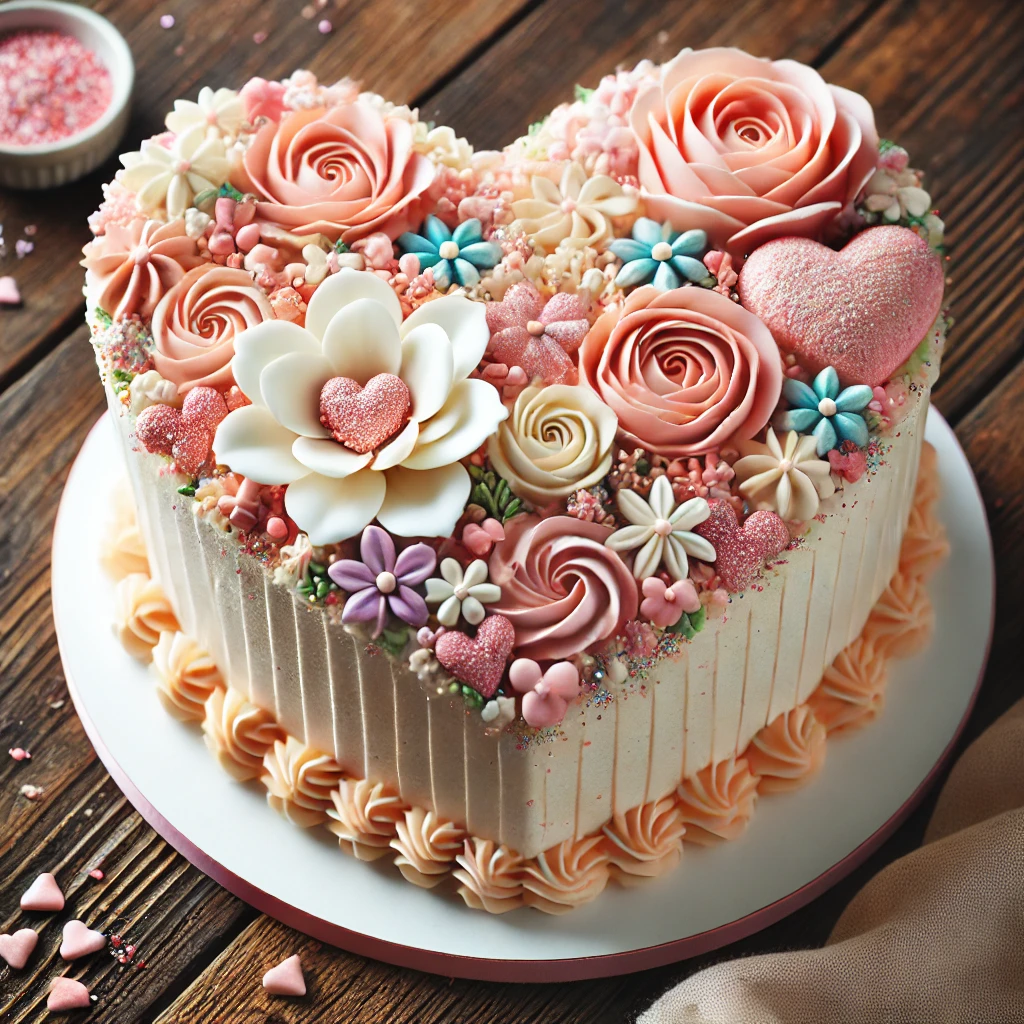
1. Piping Rosettes or Swirls for a Romantic Touch
- Use a piping bag with a star tip to create beautiful buttercream rosettes all over the cake for a floral look.
- Pipe swirls, shells, or lace patterns along the edges for an elegant border.
- Add small heart-shaped decorations or edible pearls for extra charm.
2. Ombre Frosting Effect or Marble Design
- For an ombre look, use different shades of the same color and blend them gradually from dark to light using a spatula.
- Create a marble effect by swirling two or more frosting colors together with a spatula or toothpick.
- A light dusting of edible shimmer or gold dust can add a touch of luxury.
3. Adding Fruit Toppings, Chocolate Shavings, or Sprinkles
- Fresh fruits like strawberries, raspberries, or blueberries add color and a refreshing taste.
- Chocolate shavings or drizzles of melted chocolate give a rich, indulgent touch.
- Sprinkles, edible glitter, or candy pearls can make the cake festive and fun for birthdays or celebrations.
With these decoration ideas, your heart cake will not only taste delicious but also look absolutely stunning for any special occasion!
Writing Messages on the Cake
Personalized messages on your heart cake add a special touch, whether it’s for a birthday, anniversary, or holiday. Here’s how to write neat, elegant lettering on your cake:
1. Best Frosting Types for Writing (Buttercream, Royal Icing)
- Buttercream – A smooth, spreadable frosting that’s perfect for piping messages. Choose a stiff buttercream consistency to keep the writing from spreading.
- Royal Icing – A firmer, quick-drying icing ideal for intricate lettering and detailed designs. Royal icing hardens, making it perfect for messages that need to hold their shape.
- Ganache or Chocolate Frosting – For a rich, decadent look, use a thick ganache or chocolate frosting to pipe words or small designs.
2. Using Piping Tips for Neat Lettering
- For neat, even letters, use a round piping tip (like #1 or #2). This size ensures clean, controlled strokes.
- Practice writing your message on parchment paper before transferring it to the cake to get the spacing and flow just right.
- If you want a script or cursive font, use a small, fine round tip to form the letters with elegant, flowing lines.
- Keep your hand steady and apply even pressure on the piping bag for consistent letter size.
3. Adding Edible Glitter or Metallic Accents
- To make your message stand out, sprinkle edible glitter or use metallic edible paints over your frosting lettering for a shimmering effect.
- Gold or silver leaf can be applied delicately to the edges of the letters for a luxurious touch.
- A light dusting of edible shimmer powder can give the writing a sparkly finish, perfect for celebrations.
With these tips, your heart cake will not only have a sweet message but also look beautifully personalized and festive!
Tips for Storing and Serving Your Heart Cake
How to Store Your Cake for Freshness
Proper storage is essential to keep your heart cake fresh, moist, and delicious. Here’s how to store it properly:
1. Best Practices for Refrigerating or Freezing
- Refrigerating: If you’re not serving your cake right away, store it in the refrigerator in an airtight container or covered with plastic wrap to prevent it from drying out. This works best for cakes with buttercream or cream cheese frosting.
- Freezing: If you want to keep the cake for longer, freeze it. Place the whole cake (or individual slices) on a tray in the freezer until the frosting is firm. Then, wrap the cake tightly in plastic wrap followed by aluminum foil to protect it from freezer burn. It can be frozen for up to 3 months.
- When ready to serve, allow the cake to thaw in the refrigerator or at room temperature for a few hours.
2. How Long a Frosted Cake Lasts
- A frosted cake, when stored properly, will last 3 to 4 days in the refrigerator. After this, the freshness and texture may begin to deteriorate.
- For cakes stored at room temperature (without perishable frosting like cream cheese), they typically last 2–3 days. Always check the cake for any signs of spoilage before serving.
3. Preventing Dryness and Maintaining Softness
- To prevent the cake from drying out, ensure it’s well-wrapped in plastic wrap before refrigerating or freezing. This helps to lock in moisture.
- If you’re storing an unfrosted cake, cover it tightly with plastic wrap or place it in a cake box to preserve softness.
- Cake syrups (like simple syrup) can be brushed over the cake layers before frosting to help maintain moisture.
By following these tips, you’ll ensure that your heart cake stays fresh, soft, and delicious for as long as possible!
Best Ways to Serve a Heart Cake (Heart-shaped cake)
Serving a heart-shaped cake is a great way to impress your guests and make any occasion even more memorable. Here are some tips to serve it beautifully and deliciously:
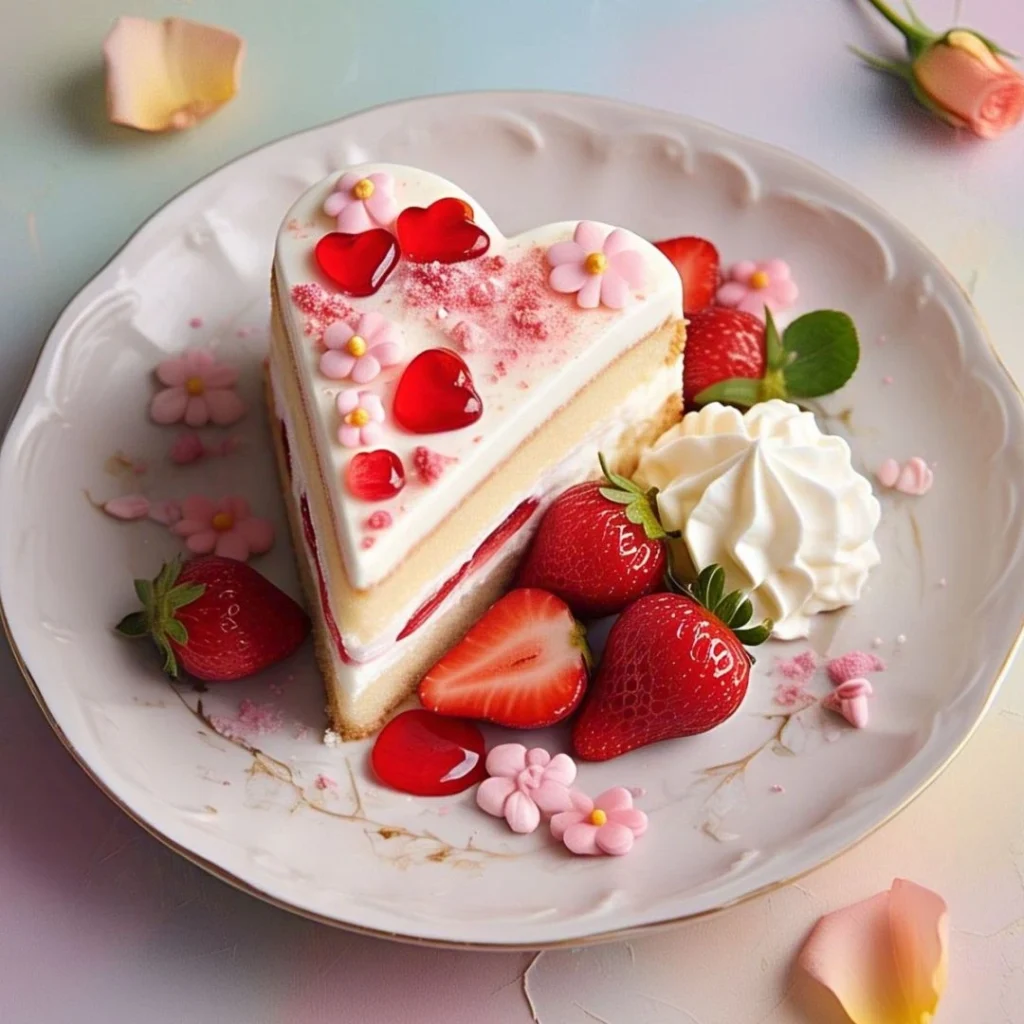
1. Cutting the Cake Cleanly for Even Slices
- To cut the cake cleanly, use a sharp serrated knife (bread knife) or a large chef’s knife.
- If the cake has a lot of frosting, dip the knife in hot water and wipe it dry before each cut. This will help the knife glide through the cake without pulling or smearing the frosting.
- For even slices, cut the cake into halves, then quarters, and continue slicing into equal pieces. If the cake is layered, make sure to cut through both the cake and the frosting layers for a smooth slice.
2. Pairing with Ice Cream or Fruit for Extra Flavor
- Ice cream is a perfect pairing with cake! Opt for classic flavors like vanilla, chocolate, or strawberry, or go for something more unique like raspberry sorbet or caramel swirl.
- Fresh fruit can elevate the flavor and presentation of the cake. Serve slices with berries, sliced strawberries, or a side of mango or kiwi.
- For extra indulgence, you can drizzle the cake with a warm chocolate or caramel sauce or top it with a scoop of whipped cream.
3. Presentation Tips for Special Occasions
- Cake Stands – Display your heart cake on an elegant cake stand or pedestal for a refined look.
- Garnishes – Scatter edible flowers, fresh fruit, or decorative sugar pearls around the cake for a beautiful presentation.
- Plates and Garnishes – Serve individual slices on decorative plates and add small garnishes like a mint sprig or chocolate shavings for an added touch of elegance.
- For special occasions like Valentine’s Day or anniversaries, sprinkle edible glitter or heart-shaped sprinkles on the plate or cake to tie in the theme.
By following these tips, your heart cake will not only taste amazing but also be beautifully presented for your guests to enjoy!
Common Mistakes to Avoid (Heart-shaped cake)
Avoiding a few common mistakes will help ensure that your heart cake turns out perfectly every time. Here are some things to watch out for:
1. Overmixing the Batter and Causing a Dense Texture
- What happens: Overmixing the batter incorporates too much air and causes the cake to be dense and heavy.
- How to avoid it: Mix the ingredients just until combined. When adding flour, fold it in gently, and be careful not to overwork the batter. Only mix until the dry ingredients are fully incorporated.
2. Not Cooling the Cake Before Frosting
- What happens: If you frost a warm cake, the frosting can melt, slide off, and cause a mess. Plus, the heat from the cake can affect the texture of the frosting.
- How to avoid it: Always let your cake cool completely before applying frosting. A good rule is to let the cake cool for at least 1 hour (or refrigerate for 20-30 minutes if you’re in a hurry).
3. Using Too Much Frosting, Making the Cake Too Sweet ‘Heart-shaped cake
- What happens: While frosting adds flavor and visual appeal, too much can make the cake overly sweet and heavy.
- How to avoid it: Apply a thin crumb coat first, then add a moderate layer of frosting. You can always add more if needed, but it’s easier to add than to remove! Aim for a balance between the cake and frosting so that neither overwhelms the other.
By avoiding these common mistakes, your heart cake will have a perfect texture, frosting, and overall appearance, making it a treat to both look at and eat!
Conclusion
Now that you’ve learned how to make and decorate your own heart-shaped cake, it’s time to get creative! Whether you go for a simple design or add intricate details, the possibilities for decorating are endless. Remember to have fun and let your personal touch shine through!
We’d love to see your heart cake creations—feel free to share your photos and tag us on social media.
For more baking tips and tutorials, check out our other recipes and guides to further hone your skills. Happy baking and enjoy your deliciously sweet creations!
FAQs
1. Can I make a heart-shaped cake without a heart-shaped pan?
Yes! You can easily create a heart shape by using a round and square cake pan. After baking, you can cut the round cake in half and arrange the pieces on top of the square cake to form a heart shape.
2. How long can I store my heart cake?
A frosted heart cake can be stored in the refrigerator for up to 3–4 days. If you need to store it longer, you can freeze it for up to 3 months. Just make sure to wrap it properly to maintain freshness.
3. What’s the best frosting for writing on a cake?
For neat, legible writing, buttercream or royal icing works best. Both hold their shape well when piped and allow for easy, clean lettering.
4. How do I prevent my cake from being too sweet with frosting?
To avoid an overly sweet cake, use a moderate amount of frosting and focus on achieving a balance between the cake and frosting layers. If you find the frosting too sweet, you can try using a less sweet option like whipped cream.
5. Can I decorate a heart cake in advance?
Yes, you can decorate your heart cake in advance. Just make sure to store it properly in the refrigerator to keep the decorations fresh. It’s best to decorate it 1 day before the event for optimal freshness.
Feel free to reach out if you have any other questions, and happy baking!

1 thought on “How To Make A Heart-shaped cake: A Step-by-Step Guide”